As in the dashboard or in the cockpit, you can configure individual grid views (bookmarks) which you can later share with team members. (see chapter The bookmark)
To configure a grid, first select the objects that are relevant to you and then the desired attributes (fields), to be able to display the information which is most important to you.
Save views as bookmarks
The configuration of a view in the gird feature (displayed objects, attributes, filters, sorts, column width and height) can be saved as a bookmark. Since this function is also of substantial importance during the configuration of a view, this subchapter is placed in front.
Depending on the intended use, you can create different grid views and save them separately by creating a bookmark: Select objects and attributes accordingly, click on the star symbol in the black header and save the grid bookmark. This will then also be displayed as a view tab under "Saved Bookmarks". Alternatively, you can click on the warning triangle in the "Standard" view tab to create a new grid view. Attention: If another view tab is selected, you overwrite the selected bookmark with this function.
Share bookmarks: As with other bookmarks, you can share the bookmarks in the grid feature with your team members. You have two options:
- … only with team members who are within this context
- … with ALL users (if the selected context is the root folder)
Important note
Save your view (bookmarks) regularly, also during configuration, so that the settings are not getting lost.
Pin bookmarks: Your saved grid views are contained in the “Saved Bookmarks” menu. If you would like to switch between your grid views more often, you can also pin them.
Select context (object selection)
In the "Select objects" menu, you define which objects from the tree structure should be displayed in the grid. The entry point in the navigation tree determines the objects displayed.
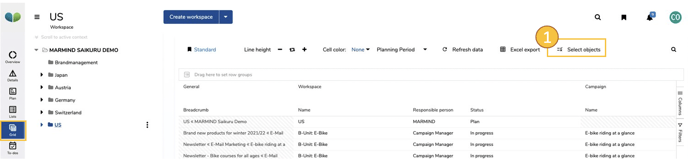
Click on "Select objects" (1) to open the selection window "Selection of objects".
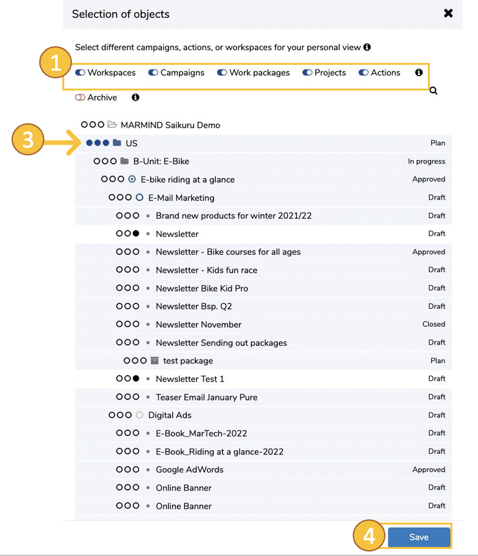
To limit the selection list of the objects, you can hide the individual object types per toggle (2).
Use the three toggles  , to select the desired marketing objects - objects that are included in the selection are highlighted in green (3).
If you select an object with included sub-objects (e.g.  ), sub-objects created later are automatically integrated in the view. Click on “Save” (4) to complete the object selection.
Selection of attributes (columns) per object type
The menu for defining the attributes (1) is located on the right-hand side of the screen, structured according to object type and sorted alphabetically.
Expand and collapse the attributes of an object type by clicking on the arrow symbol to the left of the object type checkbox (2).
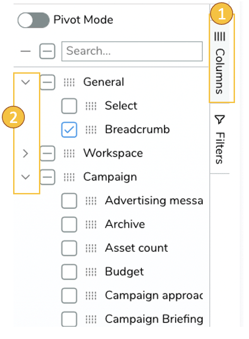
If you would like to select or deselect all attributes of an object type, then put a check at the object type (3).
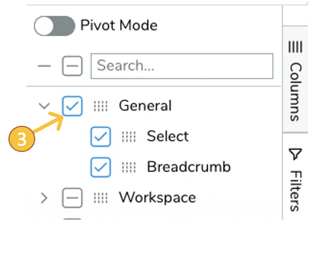
For a specified selection of the attributes, use the search field (4): Simply enter the attribute there and the list is limited to the hits (e.g. when entering the search term “valid” the attributes “valid from” and "valid to" are displayed).

Display of custom fields
In addition to the standard fields of an object, the grid feature offers the option of displaying custom fields. The condition therefore is, that custom fields have been defined and applied in the context (i.e. at least one object must be selected that contains a custom panel). See chapter Custom panel.
Editing of columns and rows
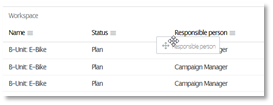
The order of the columns can be changed using drag & drop: Click on the column header (column title) and drag the column to the desired position.
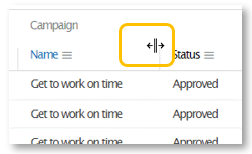
The width of each column can be changed as required: Drag the left / right edge of the respective column header to adjust the width. You can also configure an automatic width by double-clicking.
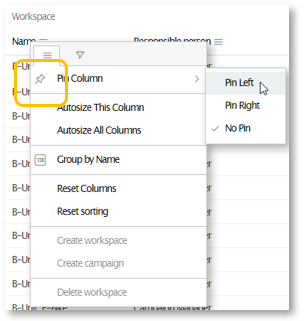
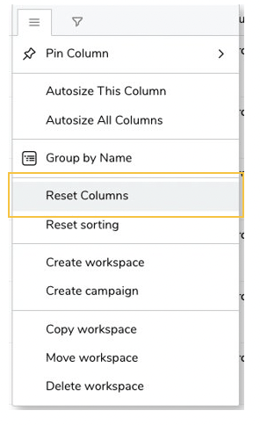
Pin columns: With large tables it is often useful to be able to always see a certain column while scrolling left-right. The Grid feature offers the option of defining one or more columns which remain fixed when scrolling horizontally ("pin column"). The columns can be fixed on the left as well as on the right. You configure the pinning and unpinning of the column(s) in the respective column menu (next to the column heading).
Adjust the line height: By default, the data records in the grid are displayed in one line. There is the possibility of increasing or reducing the line height step by step, whereby the third step sets an automatic height: This means that all cut off content is displayed - the height of the lines is maximized. The line height is set to level 1 by clicking on the "Reset" button.

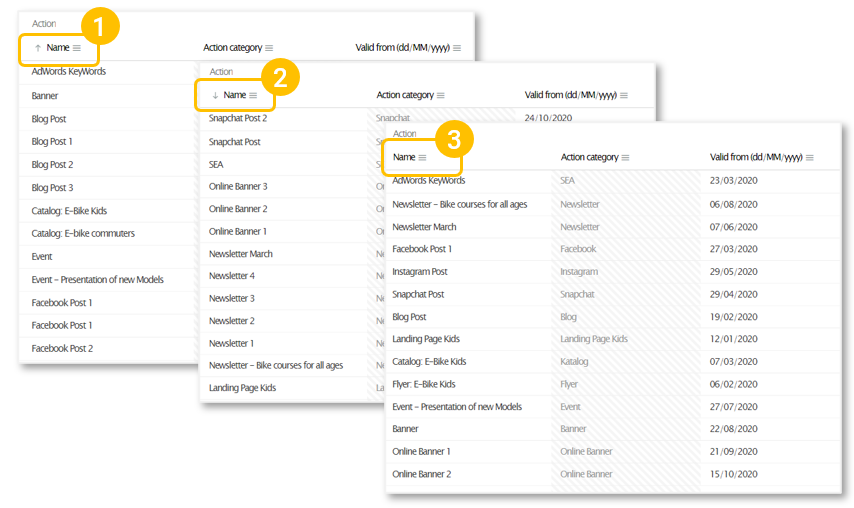
Sorting
When opening the grid, the objects are by default sorted according to the tree structure. The sorting logic is mentioned above.
Alphabetical sorting per column:
By clicking on the column header, the sorting can be changed as follows:
- first click: ascending, alphabetical order
- second click: descending, alphabetical order
- third click: cancel sorting (reset according to the tree structure)
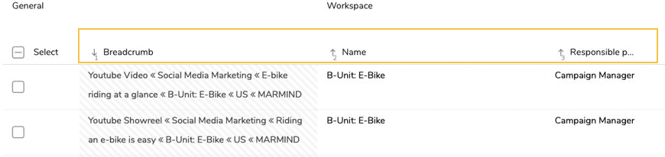
Multistage sorting:
In the Grid feature you can also sort by several columns at the same time. Hold down the SHIFT key and click on the column header:
- Select several columns to be used for sorting,
- Change the sorting from ascending to descending with another click on a selected column and
- Remove a sorting for an individual column.
The sorting of the grid can also be reset to standard via the menu in the column header.
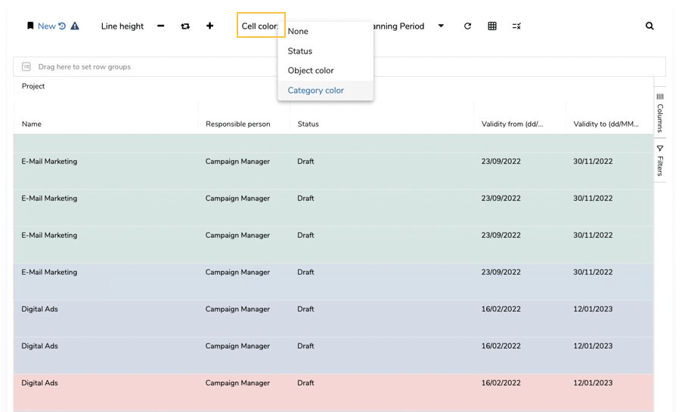
Highlighting (cell color)
By default, the lines are shown without a colored background ("None"). However, the lines of the objects displayed can be highlighted in color using the "Cell color" menu:
- By status
- According to object color
- According to object categories