
The core contents of marketing are, of course, the products, target audiences and target regions. In order to ensure that the company-specific data on these three areas is available in a consistent manner, it can be recorded and managed in the settings in appropriate menus.
Create and manage products and product types
You can create your products in the "Products and product data" settings area under "Attribute". The key data on the product are recorded here. MARMIND® offers a three-stage product classification:
- Product type (mandatory)
- Product category (optional) and
- Expression (optional)
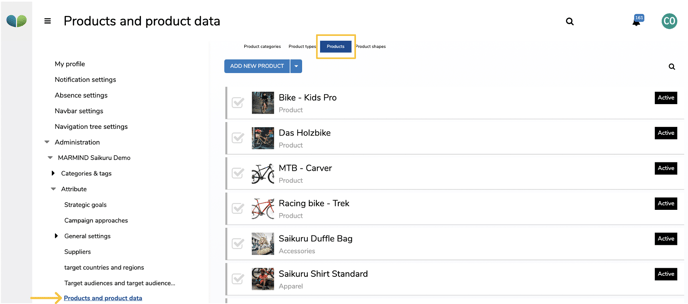
The fully configured product is only selected later in the marketing objects. This way, you ensure a uniform product description and can efficiently fill your marketing objects with the essential information.
Record product in 4 steps
In summary: Before products are defined, at least the product types must be created. These can be further differentiated according to product categories. Independent of this, product shapes can be defined - an identifier is then assigned in combination with the product (a product can have several shapes). The steps of product definition are described in detail below.
Step 1 - define product categories
Go to the “Product Categories” section (1) and click on “Add new product category” (2). A new line appears in the list in which you can assign the name of the product category (3). Then click on "Save" (4).
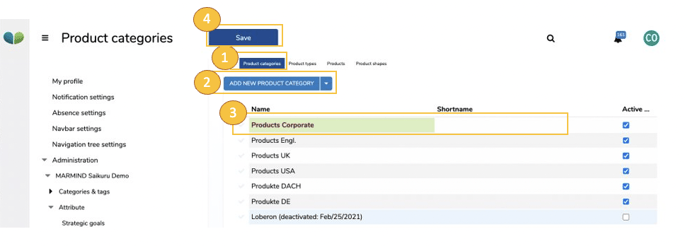
You can deactivate list elements by ticking the checkbox in the "Active" column (or in the pop-up menu of products). Deactivated elements are not displayed in the selection but can be activated again.
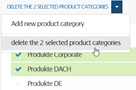
To completely delete list elements, check the corresponding elements (left) and select “Delete the selected product category” from the drop-down menu. These will no longer be available in the selection. The "Activate / Deactivate" and "Delete" actions must be carried out in a comparable manner in all sections (steps 1 to 4).
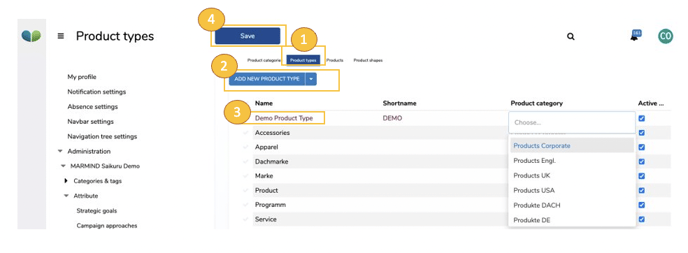
Step 2 - define product types
Go to the "Product types" section (1) and click on "Add new product type" (2). A new line appears in the list in which you can assign the name of the product type and assign a product category (3). Then click on "Save" (4).
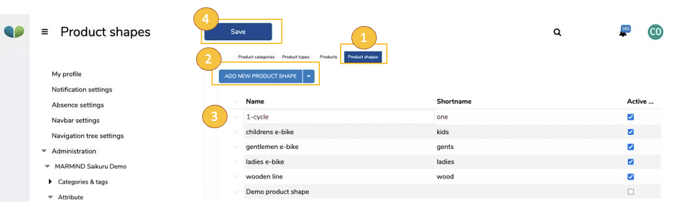
Step 3 - define product shapes
If you want to assign certain shapes to a product, switch to the “Product shapes” section (1), otherwise continue with step 4. Click on "Add new product shape" (2). A new line appears in the list in which you can assign the name of the product shape (3). Then click on "Save" (4).
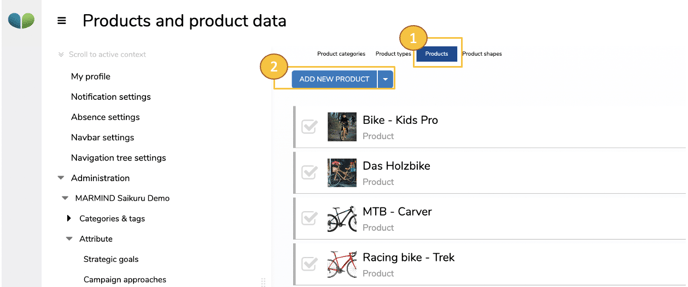
Step 4 - define the product
After you have prepared all the “ingredients” for your product, you can create your product. Switch to the “Products” section (1) and click on “Add new product” (2).
The "New Product" popup opens - enter the name of the product and select the product type. If you have also assigned a product category for the product type, this will then be displayed (read only).
If you have also defined product shapes, you can now assign them here. A product identifier must be defined for each assigned characteristic.
For a better breakdown, you can enter more information here (range, group, type, number, price). You can also add a description and assign keywords.
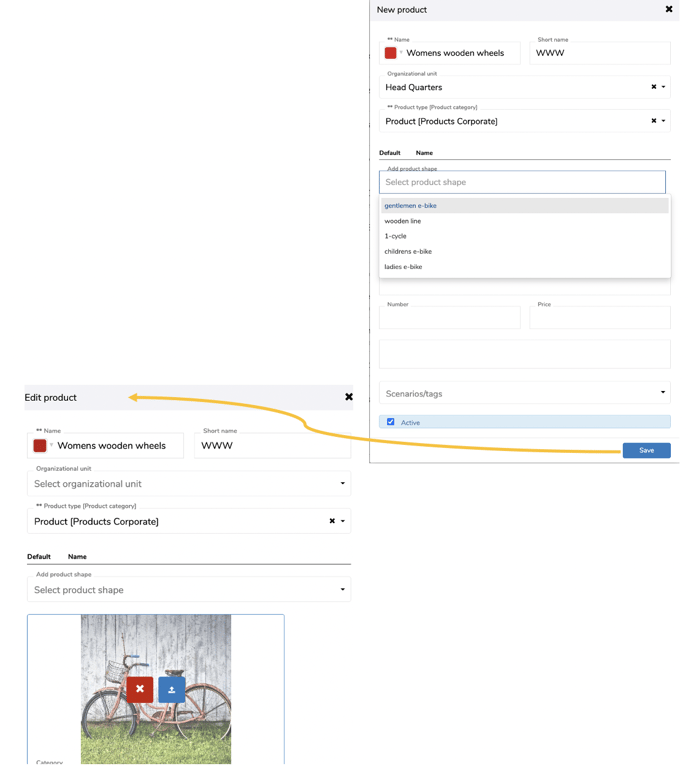
When you click on save, you are automatically forwarded to the “edit product” pop-up. There you can assign an image to better distinguish the target group. Click on the blue upload icon and select a suitable image.
The new list item is saved in the background.
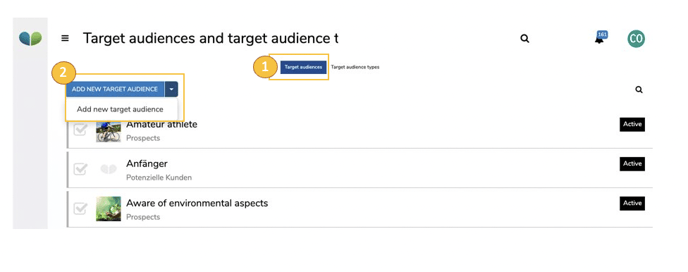
Create and manage target audiences and target audience types
An object cannot be assigned to target audiences until they have been pre-defined by an admin user. This is possible in the "Target audiences and target audience types" menu in the settings. Before a target audience can be defined, target audience types must first be created.
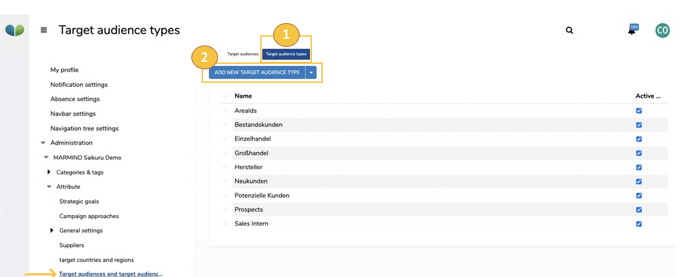
Step 1 - create target audience types
Go to the “Target audience types” (1) tab and click on “Add new target audience type” (2). A new line (green) appears in the list of target audience types – double-clicking on the line activates it and you can assign a name. Then click on "Save".
Change the name of a target audience type by clicking in the line, overwriting the value, and then saving (a green save button appears on the right above the list after changes). Or set a target audience type inactive (remove the checkmark in the "Active" column).To remove a list item, select the line (check mark to the left of the name) and select "Delete selected target audience type" in the drop-down menu.
Step 2 - create target audiences
Now switch to the "Target audiences" section (1) and click on "Add new target audience" (2).
The "new target audience" pop-up opens, where you enter the name of the target audience and the type of target audience.
You can also provide a description or annotations here, as well as keywords. When you save, the new audience appears in the list.
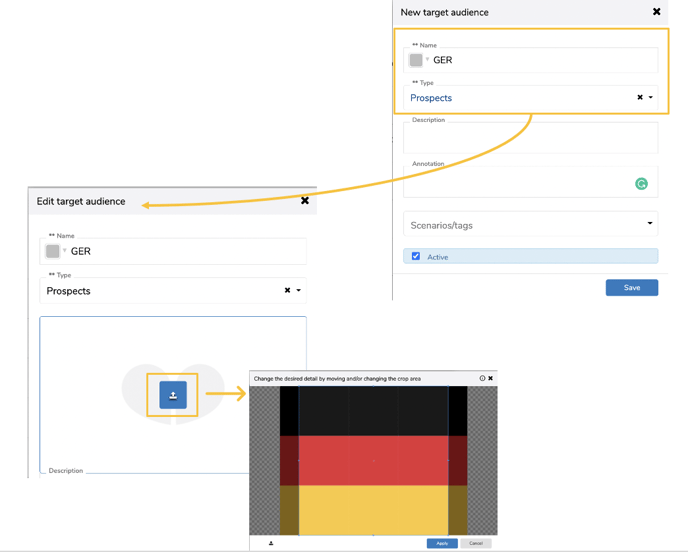
As soon as you save, you will automatically switch to the "Edit target audience" popup. There you can assign a picture to better distinguish the target audiences. Click on the blue upload symbol and select a suitable image.
The new list entry is saved in the background.
Create and manage target countries and regions
To set a geographic focus, you must define target countries and regions in MARMIND®. To do this, go to "Target countries and regions" in the navigation tree.
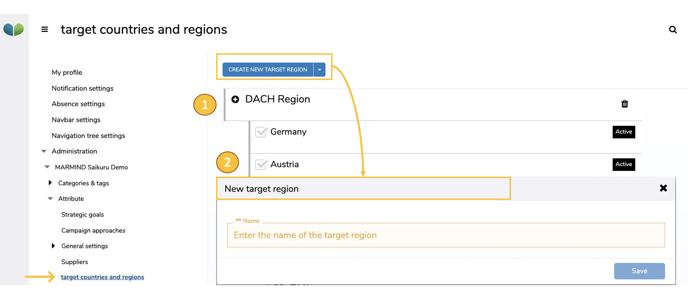
To create a new target region, click "create new target region" – the pop-up "new target region" opens in which you simply assign and save the name.
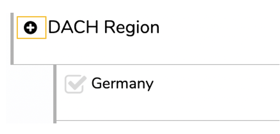
The region will then appear in the list (1). To add individual countries to the region, click the "+" icon on the region's line- the “new target country” pop-up opens.
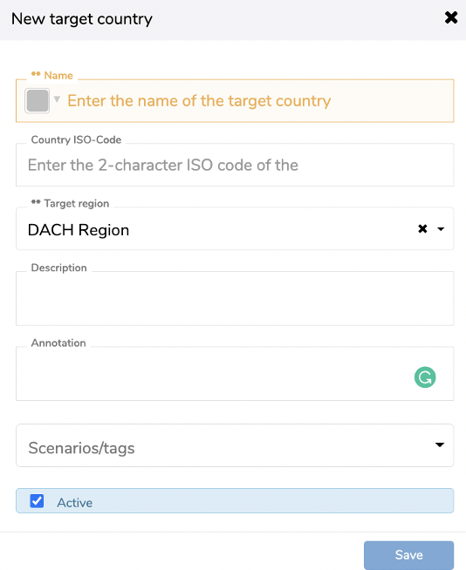
Here you enter the name of the country as well as the ISO code (for Austria e.g. "AT") and click on save. The country appears as a sub-entry of the target region in the list.
To delete countries, first select the appropriate countries by clicking the check mark icon (to the left of the name). In the drop-down menu, select "delete selected target country". To delete a target region, simply click on the garbage can icon.
Important note
Products, Target audiences, and Target countries that are already in use cannot be deleted.