Custom fields, groups, and panels can be created for company-specific information. How these are built is described in part II, chapter. 2.4 Create and manage custom fields, groups and panels. This chapter introduces the use of such panels.
Setting up a custom panel (create and configure mutations)
When a new object (e. g. a campaign) is created, the panel defined in the settings appears with all its groups and fields.
Depending on the configuration, there are different manifestations, depending on the following aspects
- "Auto populate": This function should always be activated.
- "Mutation required": A mutation must be created here
A panel that has “Auto populate” enabled but does not require a change is available without any further configuration.
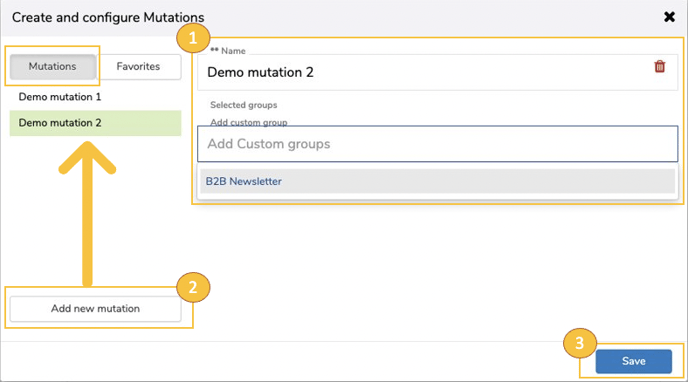
A panel that requires a mutation, however, must be configured first, before it can be used in the context. A mutation is like a tab —it can be grouped together in several groups. To create a new mutation, go to the "Details" tab, click on your chosen campaign, and click the pencil icon on the right side of the panel header:

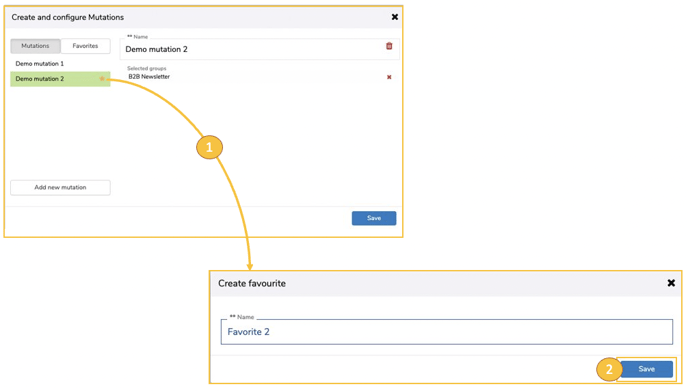
The pop-up "Create and configure mutations" appears, in which mutations can now be created. Give the mutation a descriptive label ("name") and select the groups you want (1). To create multiple mutations, click the "add new mutation" button (2). When the configurations are complete, click "save" (3).
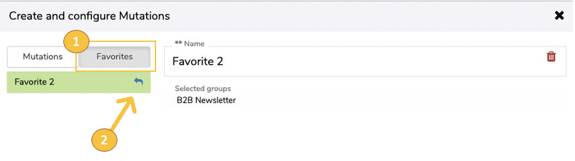
If you want to use a mutation multiple times with the same groups, it is best to work with favorites. If you hover over a mutation, a star symbol appears - by clicking on it you open the "Create favorite" dialog (1). Assign a unique name to the favorite and click on "Save" (2). The favorite is created and appears in the list in the "Favorites" tab.
Switch to the "Favorites" tab (1). If necessary, you can adjust the name and groups again. To create a mutation from the favorites, click on the arrow in the favorites list (with mouseover) (2). You can adopt the favorite as a mutation as often as you like.
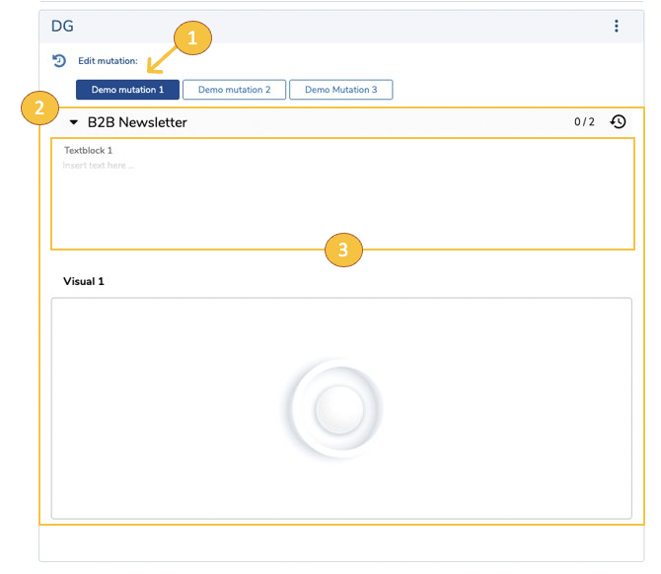
Once you click save, the configurations —name of the mutation (1), assigned groups (2) with defined fields (3) - are displayed in the panel:
Each element in the custom panel has its own history  :
:
- Panel
- mutation contained therein (each activated mutation - green)
- groups contained therein (per group)
- Fields contained therein (per field)
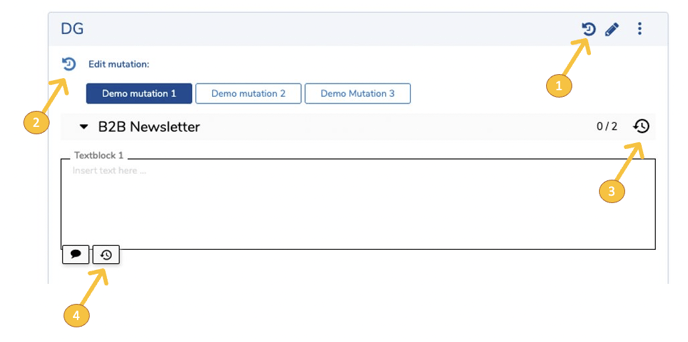
In addition, individual fields (of each type) can be commented via  icon. Fields, that are already commented, show a yellow speech bubble icon
  .
.
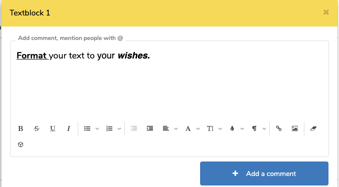
Field contents (within the comment section) in rich text format can be formatted.
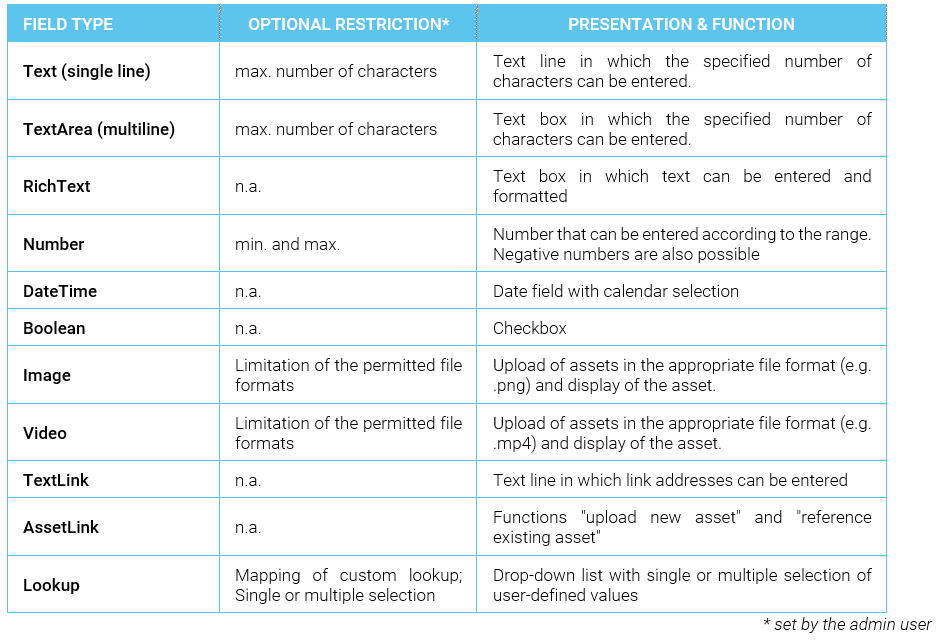
A detailed description of field types, display variants, and connection to action categories can be seen in chapter Create and manage custom fields, groups and panels. For a better understanding, the field types are listed here again: