
Suppliers and Vendors
The master data on vendors and suppliers are relevant for the allocation of costs but also for communication with external partners.
Suppliers are used in the context of campaigns, vendors in turn are given in terms of expenditure and actual costs.
Administration of vendors: Go to the menu item "Vendors" (1) in the navigation tree under "Budget & costs" and click on "+ Add" (2).
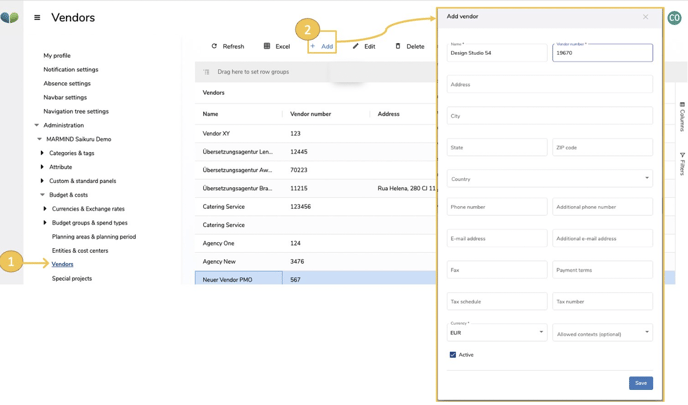
In the "Add vendor" pop-up, you can define the relevant master data, but at least you must input a name and vendor number.
As soon as you click on "Save," the new vendor appears in the list. As an admin user, the vendor that has just been created is automatically approved and can be selected in the context of issues.
When a contributor or moderator requests a new vendor, this appears in the list with the status "Draft" and must first be approved by an admin user ("Approve vendor").
Administration of suppliers: The master data administration of suppliers works in a similar way to the creation of vendors: Here, however, there is an additional grouping of suppliers, namely with so-called "supplier type". These must be defined in advance:
Supplier type: Go to the menu item "Suppliers" (1) in the navigation tree under "Attribute" and switch to the tab "Supplier type" and then click "Add Supplier Type." (2).
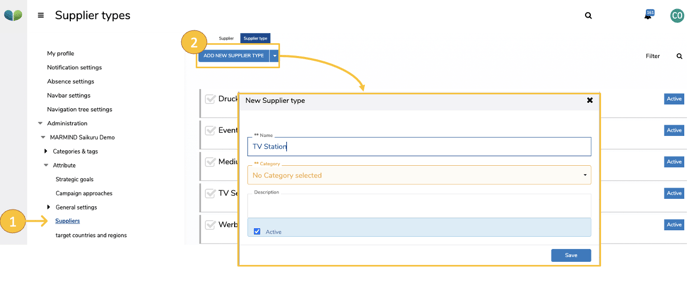
There you click on the “Add new supplier type” button and the “New supplier type” popup will open. Here you define the name and category of the supplier type.
Important note
The categories “Media” and “Producer” must be set in order to later display the correct selection options in the action. Depending on the form that was defined in the action category, either the panel appears"Communication" (with supplier types in the "Media" category) or
“Production” (with supplier types in the “Producer” category).
A form must have been stored for each action category so that the appropriate providers then appear in the drop-down. Details on the form types can be found in the chapter Action category forms.)
You can edit the supplier types at any time by clicking on the corresponding list entry.
Supplier: After you have defined supplier types, you can now define the supplier yourself. To do this, switch to the "Supplier" tab (1). To add a new supplier, click on the "Add new supplier" (2) button. The "New Supplier" popup opens:
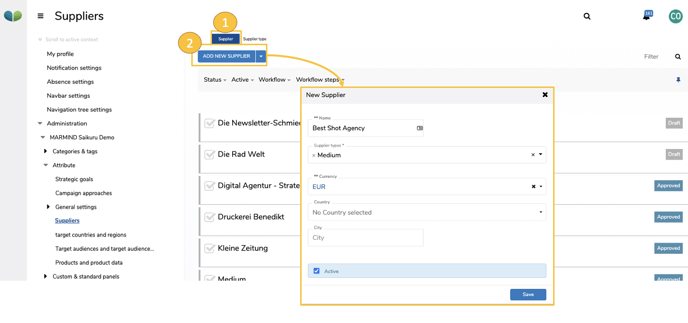
Assign a name here and select the appropriate supplier type (multiple selections possible). Define the currency in which the supplier charges. It is also important to assign the advertising channels ("channels") in which the supplier should be available for selection. The channels that are configured in the "Projects and Actions" settings menu are available for selection (see chapter Projects & Actions (categories and channels))
Optionally, you can define the country and city as master data for the supplier.
A supplier can therefore be assigned to one or more supplier types (i.e. it can be both a media and a producer) and one or more advertising channels.
As soon as you click on “Save”, the new supplier appears in the list. As an admin user, the supplier that has just been created is automatically approved and can be selected in the context of corresponding actions.
When a contributor or moderator requests a new supplier, this appears in the list with the status "Draft" and must first be approved by an admin user ("Approve supplier").

Plan settings (calendar)
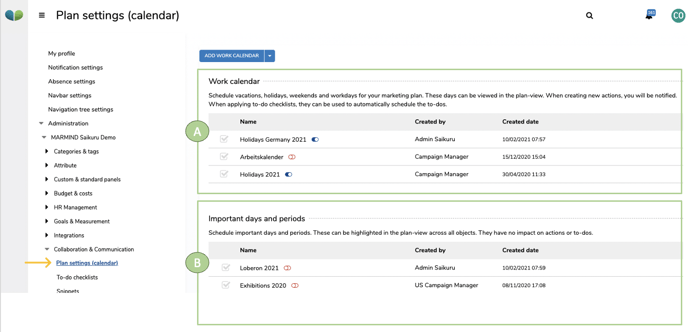
In the plan settings under "Collaboration & Communication", you can manage your calendars:
- Work calendar [A]: Here you define working days as well as public holidays or company rest periods. This calendar is also the basis for calculating to-dos (checklists). Weekends and public holidays are not counted as working days.
- Important days and periods [B]: Here you can manage company events or trade fairs. These can be color-coded in the plan across the entire calendar area.
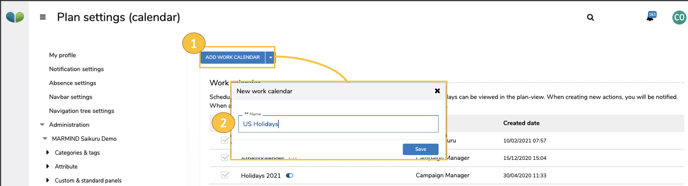
To create a new work calendar, go to "Plan settings" and click on "Add work calendar" in the dropdown menu (1). In the pop-up "new work calendar" you can enter a name (2) for your calendar (for example, US Holidays 2020) and click “Save”. The calendar now will be displayed in the list of work calendars.
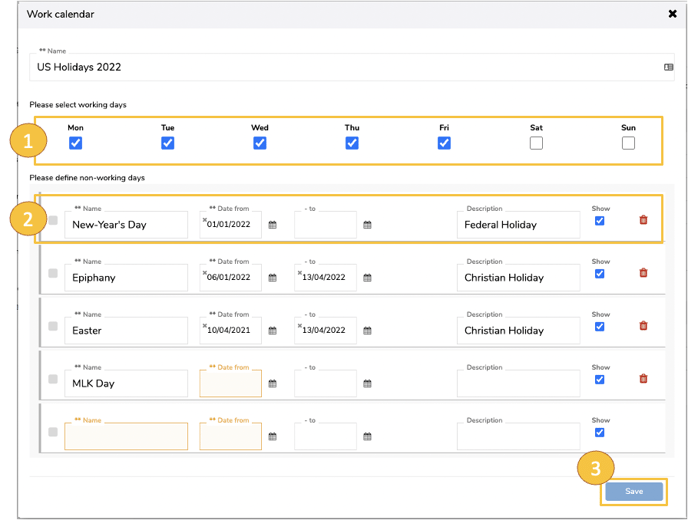
To define the days in the work calendar, open the new list entry (by clicking). The pop-up "Work calendar" will open.
Select the working days (1) and enter the non-working days (2). Name the nonworking days and pick the color, which later the bar in the plan shall have. For single days only enter the “date from” field. You also can have a period of non-working days, e.g. for company vacations. In the comment field, you can enter further information, which will appear in the plan via mouseover at the bar. You are also able to decide for each entry whether to show it in the plan or not (checkbox) – this has no influence on the calculation of the working days. Single entries can be deleted by clicking on the  -icon. When you click on „Save“ (3), the days in the calendar are considered accordingly.
The management of calendars plays a major role, for example, in the application of checklists. Checklists represent successive and parallel process steps in MARMIND®.
In the chapter To-do checklists template management – see following chapter – for each to-do you can define a generally valid start point (+/-days deviation) based on a checklist-specific reference date. This reference date determines the start date of a to-do. The end date is calculated further from the start date (deviation) plus the duration that has been set for the to-do:
End Date = Reference Date – Days Deviation + Duration (Days)
Applying a checklist, the user can decide whether a work calendar should be taken into account in the respective checklist. If a working calendar is chosen when applying a checklist, only the working days will be counted when calculating the start date or the to-dos (+/-days deviation). Also, the duration will be counted as working days.
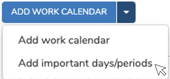 To create a calendar for important days and periods, click in the drop-down menu on "Add important days/periods".
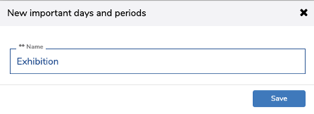
In the input window "New important days and periods" enter a name for your calendar (e.g. “Exhibitions 2020”) and click on "Save".
The calendar is now displayed in the list under "Important days and periods". To define the days in this calendar, open the new list entry (by clicking on the name). The input window "Important days and periods" opens.
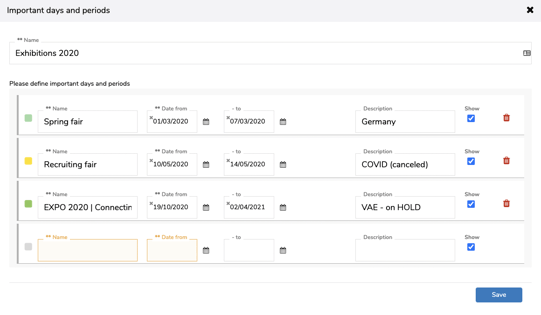
Name the important day and choose the color in which the bar and the calendar area for the selected period should be displayed in the plan. For individual dates, just enter the corresponding day in the "Date from" field - for a period add the corresponding date in the "- to" field. You can enter further information in the comment field, which will later be displayed in the plan in the mouse-over of the bar. At this point, you can also decide for each individual entry whether it should be displayed in the plan (checkbox). Individual entries can be deleted using the  -symbol. As soon as you click on "Save", the calendar can be displayed accordingly in the plan.
To-do checklists template management
To-do checklists are used to map standard processes in MARMIND®. The creation and administration of the to-do checklists can be done in the setting menu “To-do checklists” under "Collaboration & Communication". Finished checklist templates can be applied by the users in the context, which increases the efficiency when operating with repeating tasks.
There are two types of checklists in a checklist template, which can also be combined with one another within a checklist:
- Checklist without work package
- Checklist with work packages
A checklist without a work package generates the to-dos when using the checklist on an object directly on the object (campaign, project, action, work package or to-do).
When the checklist is used on an object (campaign, project or action), a checklist with work package generates a new work package in which the to-dos are created.
To create a new to-do checklist template, click in the drop-down menu on "Add new to-do checklist" (1). A new line appears in which you enter the name of the checklist template (2). Click on "Save" (3). After the save process, the checklist template is created. The detailed work is done in the template management - click on the pencil symbol (4) in the line: The input window "Manage to-do templates" opens.
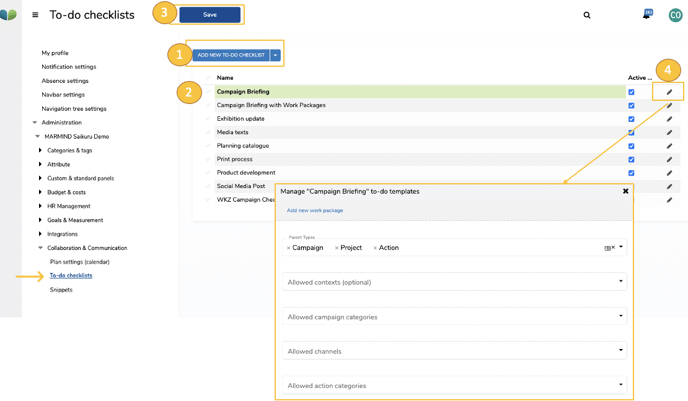
Here you can optionally restrict the scope of the to-do checklist:
- by object type ("Parent Type") - application for campaign, project, action and / or to-do additional for each object type
-
- the campaign category (for campaigns)
- the channel (for projects)
- the action category (for actions)
- the to-do category (for to-dos)
- according to context - application only in the selected marketing context (object including all sub-objects).
Template management for to-dos without a work package:
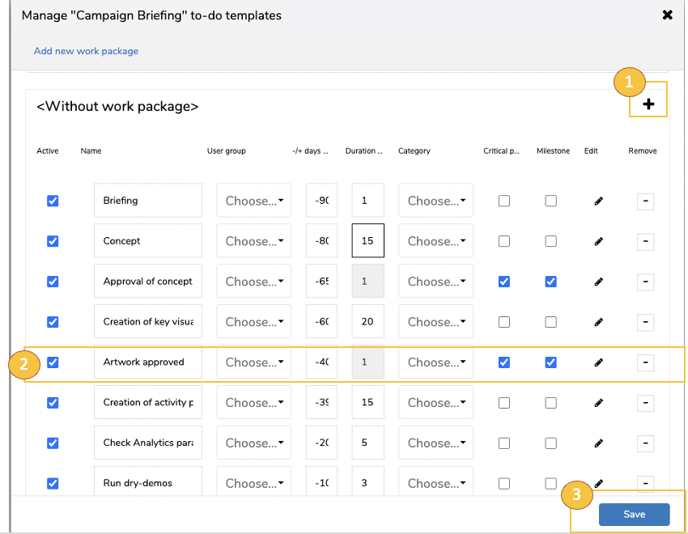
To add to-dos, click on the blue “+” symbol (1) in the gray group header <Without work package>. A new line (2) appears in which you define the subject of the to-do and optionally user groups (workflow groups). Define how many days the start of the to-do should deviate from the reference date (minus = before the reference date, plus = after). Determine the type of to-do using the "Critical Path" or "Milestone" checkboxes.
In order to deactivate a to-do in the checklist, uncheck the "Active" checkbox. To remove a to-do completely, click the "-" symbol in the line.
You can optionally add a description and keywords using the pencil symbol. Click on “Save” to complete the template management.
Template management for to-dos with work package:
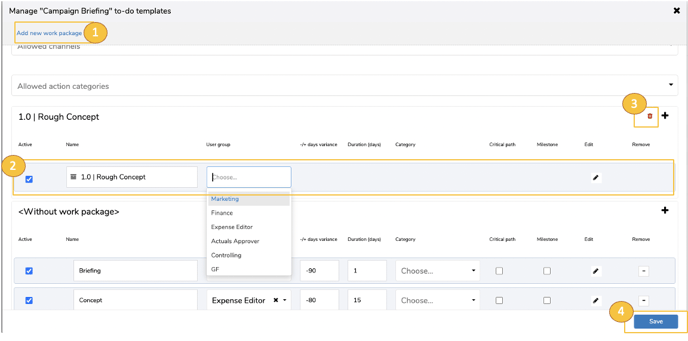
To manage to-do checklists in a work package, you must first click on “Add new work package” (1) in the template management - a new group will appear. First assign the name for the work package (2). You can optionally define user groups and keywords for the entire work package.
To-dos in work packages are created in the same way as in checklist groups without work packages (see above).
If the checklist template is no longer required for the work package, delete it by clicking on the -symbol in the group header (3). When you have finished defining the checklist template, click on "Save" (4).
The to-do checklist is now ready for use in a marketing context. You can apply checklists to different objects at any time. Recurring to-dos are created efficiently. The use of to-do checklists in a marketing context is described in Part III, chapter 6.5 To-do checklists.
Tip
Consider weekends and public holidays for the calculation of to-do due dates by defining your company’s duty in the admin settings in “Plan settings” – chapter Plan settings (calendar).